Build Your First Product in Savor Live
Add it once, sell it everywhere in your app
Your app is branded and looking sharp. Now it is time to add something customers can buy. Creating a product in Savor Live is fast, and every product is ready for secure payment at checkout. Use the guide below to set it up right the first time, then publish when you are ready to sell.
Why this matters
A clean product page removes friction. Clear names, photos, sizes, and modifiers help guests order with confidence. You get fewer questions, faster lines, and better data on what sells.
Quick tips before you start
Gather one square image and any short video clips
Decide where this item is available and how it will be fulfilled
Keep names short and use simple language for modifiers
Step by step: Create a product
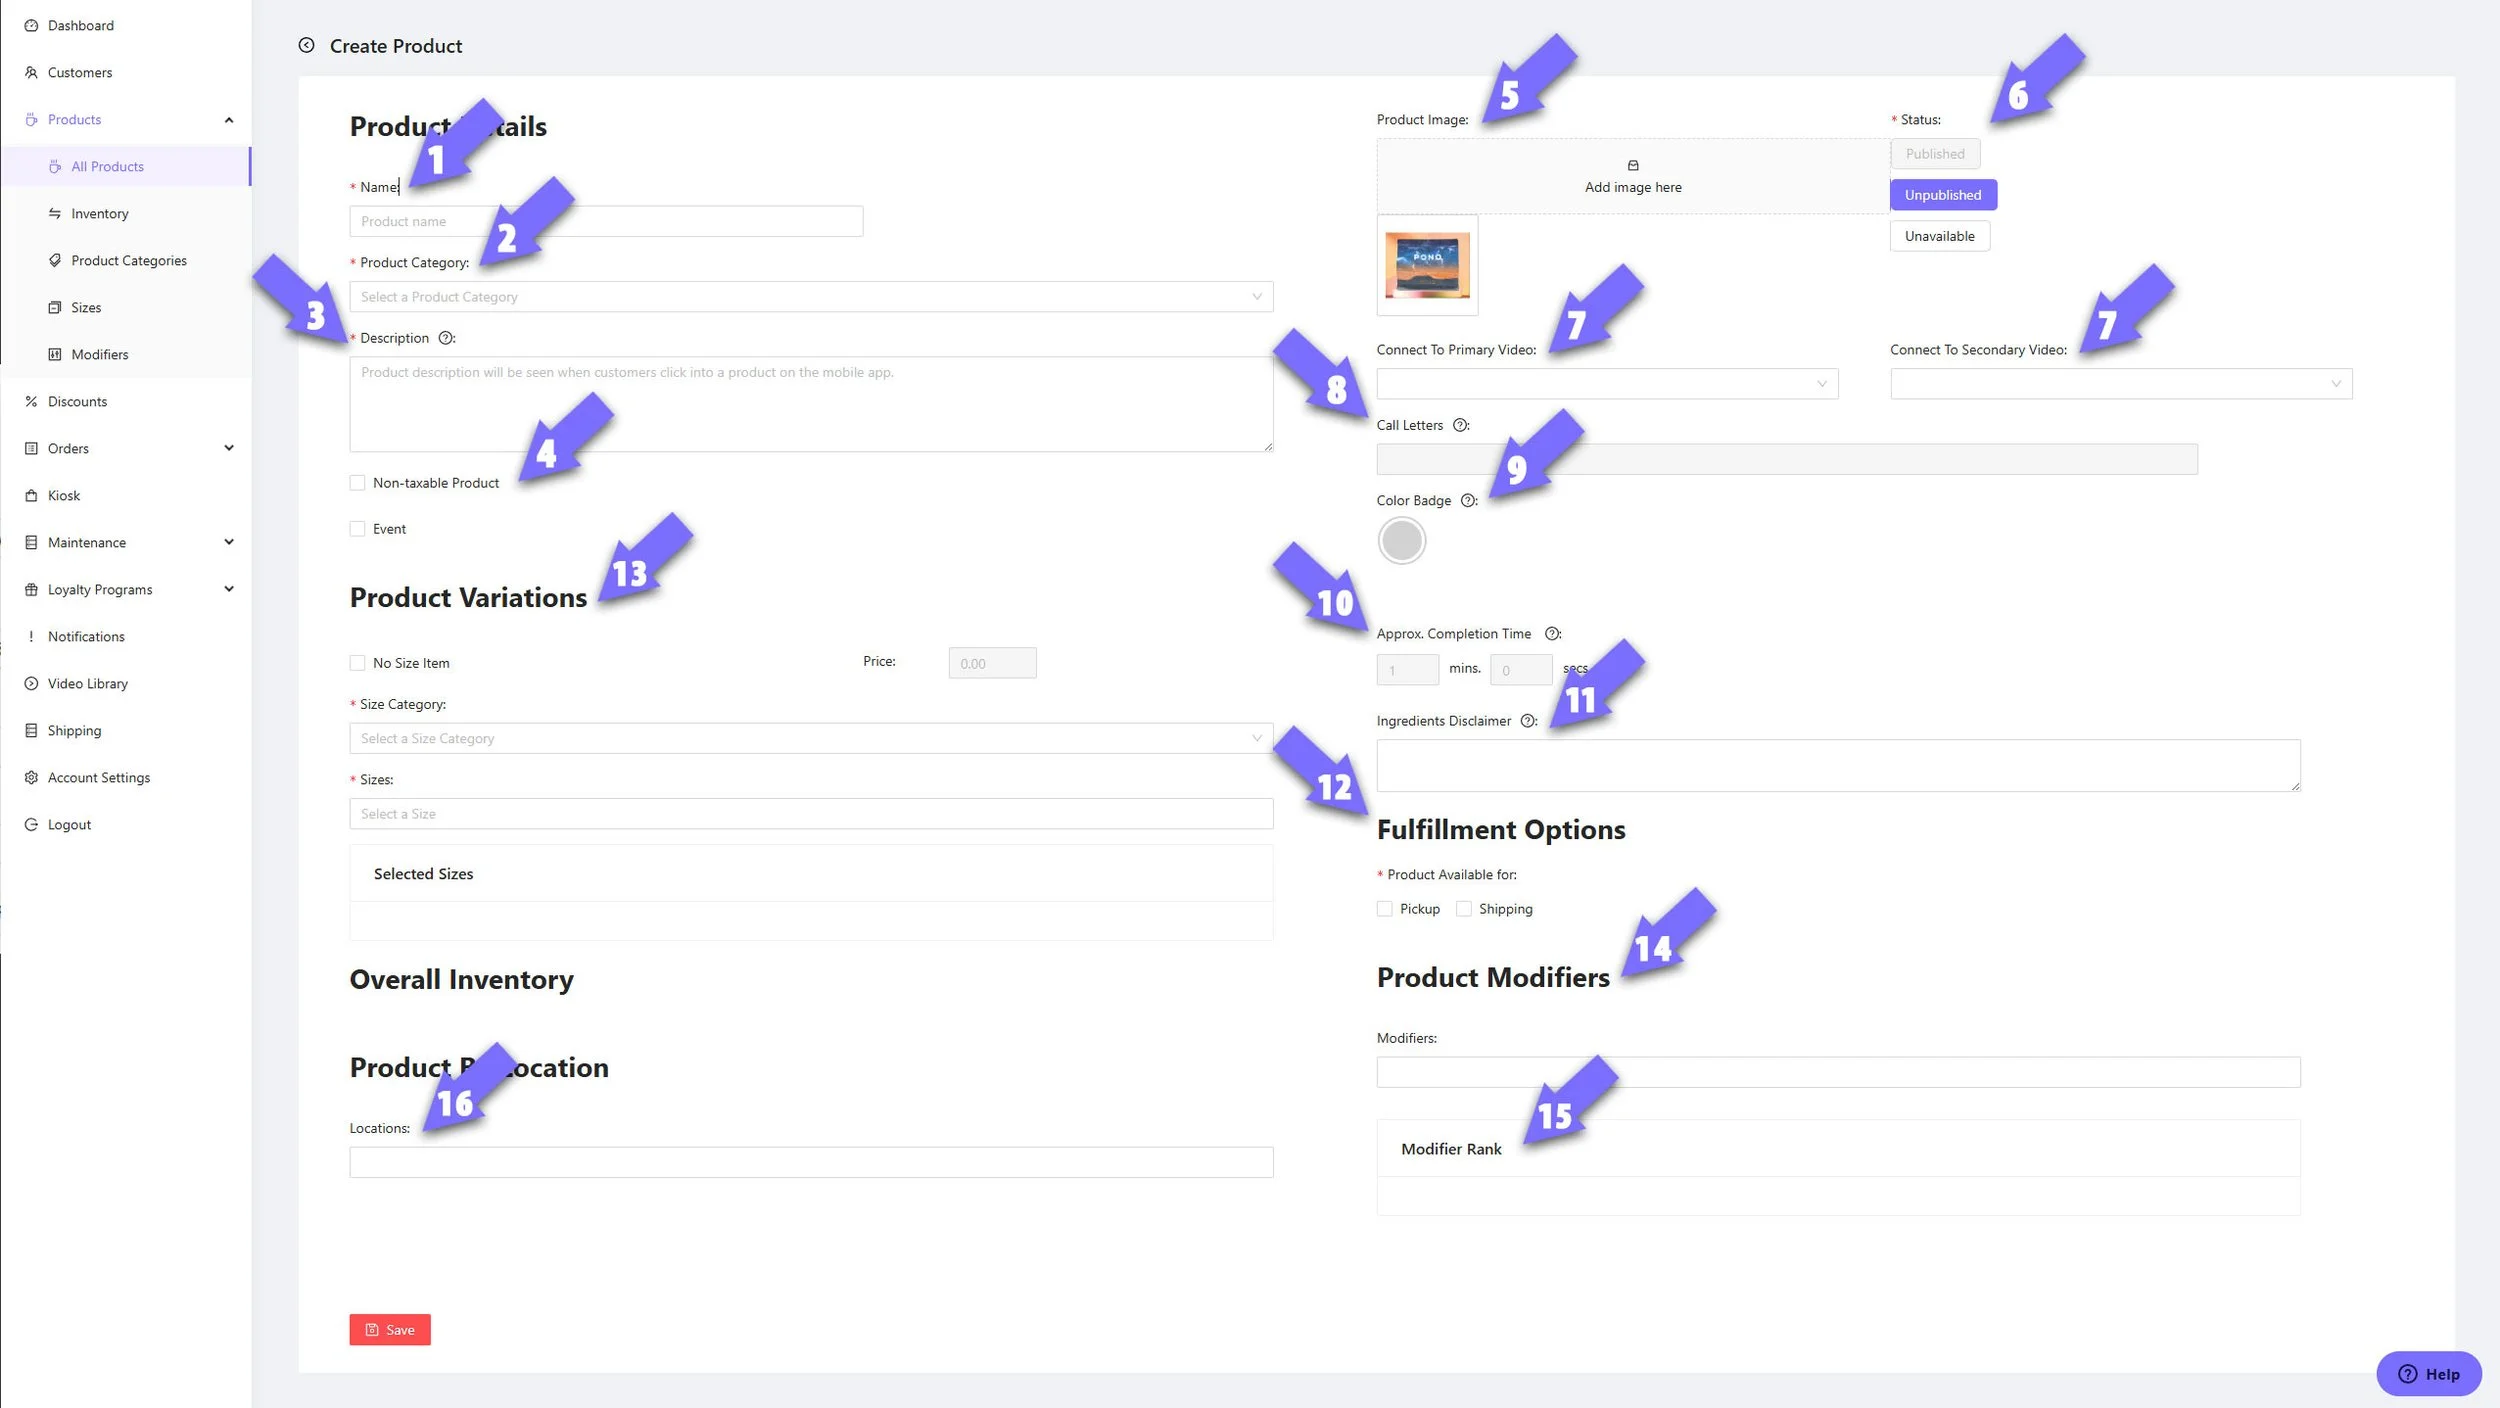
Name
Give the item a short, clear name customers will recognize.Product Category
Pick Drinks, Food, Coffee Bean, or create a custom category.Description
Write what it is and why it is great. Larger character limit, so include tasting notes or prep details.Create Event Tickets
Use the Event checkbox if the item is an event ticket to be purchased, which will then display in the E-Wallet. This could even be a free event to promote app downloads.Product Image (1 single image)
Upload a square image. JPEG is recommended for speed and clarity.Status
Choose Published, Unpublished, or Unavailable (shown but grayed out to show temporarily unavailable) based on your launch plan.Primary and Secondary Videos
Add optional clips that show the drink, brew instructions, packaging or brand or producer highlights.Call Letters
Set up to 3 characters to show clearly in all display systems.Color Badge
Pick a badge color so staff can identify the item at a glance.Approx Completion Time (coming soon…)
Enter minutes and seconds to set honest pickup estimates.Ingredients Disclaimer
Add allergy or ingredient notes as needed.Fulfillment Options
Choose Pickup, Shipping and/or Subscriptions. Use Pickup for cafe orders. If shipping or subscriptions are not part of your plan, leave them off.Product Variations
Define size and price. Use a size category like “oz” or “lb” or create your own. Example sizes: 8oz, 12oz.Product Modifiers
Add choices such as Extra Shot, Drink Temp, Syrups, and Milk.Modifier Rank
Arrange modifier groups so the most common choices appear first.Product by Location
Select which locations can sell this product.
Finish
Click Save Product. Your item is now ready for test orders and payment.
Make it easy to buy
Use bright, well-lit photos
Keep modifiers simple and grouped by type
Utilize descriptions and videos to increase consumer confidence.
What to check after saving
Place a test order to confirm routing and labels
Verify the price, tax, and size display on mobile
Review the product in your analytics after day one